Nowadays, most hosting companies use Softaculous as their installer. This is because Softaculous is proven to have capabilities that far exceed its predecessor, Fantastico. Softaculous also has more scripts compared to Fantastico and the best thing is that the updates are very fast. For the WordPress installer only, we can determine the database name, prefix and we can even determine whether to use WordPress single or WordPress Multi User (WPMU).
So, let’s try installing WordPress using Softaculous. First, log in to cpanel and look for the WordPress icon. Very fast because the WordPress icon immediately appears on the cpanel home page.
Softaculous is a popular auto-installer software integrated into many hosting control panels. It simplifies the process of installing web applications, including WordPress. In this documentation, we will guide you through installing WordPress using Softaculous.
Prerequisites #
Before you begin, make sure you have the following:
- Access to your hosting control panel (such as cPanel or Plesk).
- Login credentials for your hosting control panel.
Step 1: Access Softaculous #
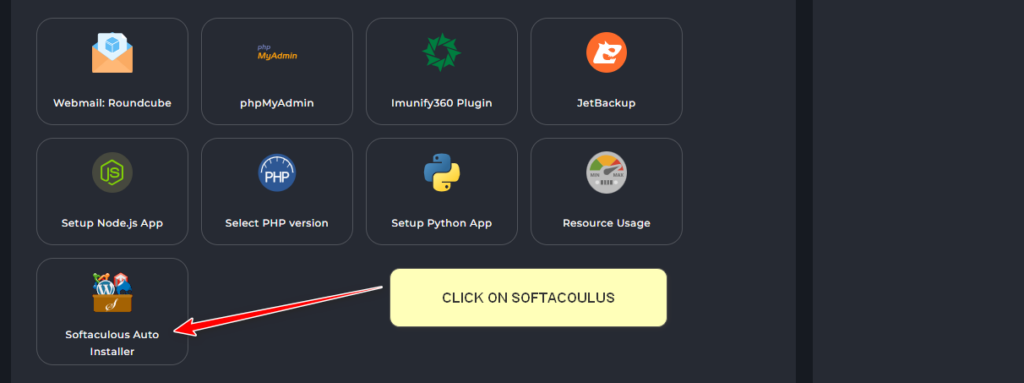
- Log in to your hosting control panel using your credentials.
- Locate the section named Softaculous, often found under the Auto Installers category.
Step 2: Find and Select WordPress #
- In Softaculous, you will find a list of applications available for installation.
- Click on the WordPress icon or search for WordPress using the search bar.
Step 3: Start the Installation #
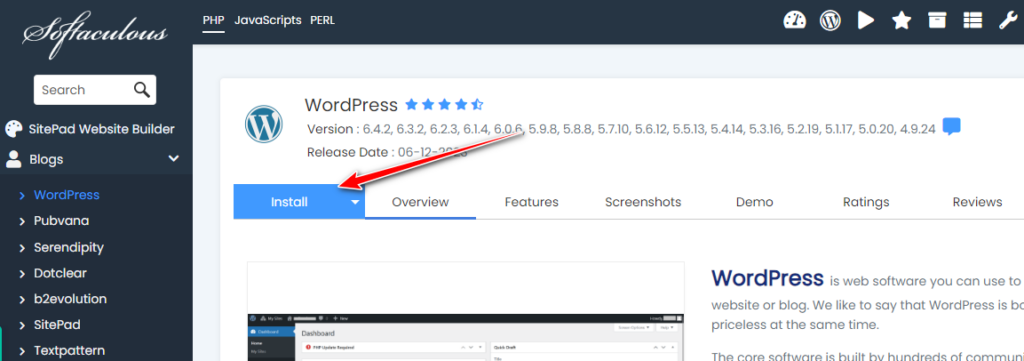
- After selecting WordPress, you will land on the WordPress installation page in Softaculous.
- On this page, click on the “Install” button to start the installation process.
Step 4: Configure the Installation #
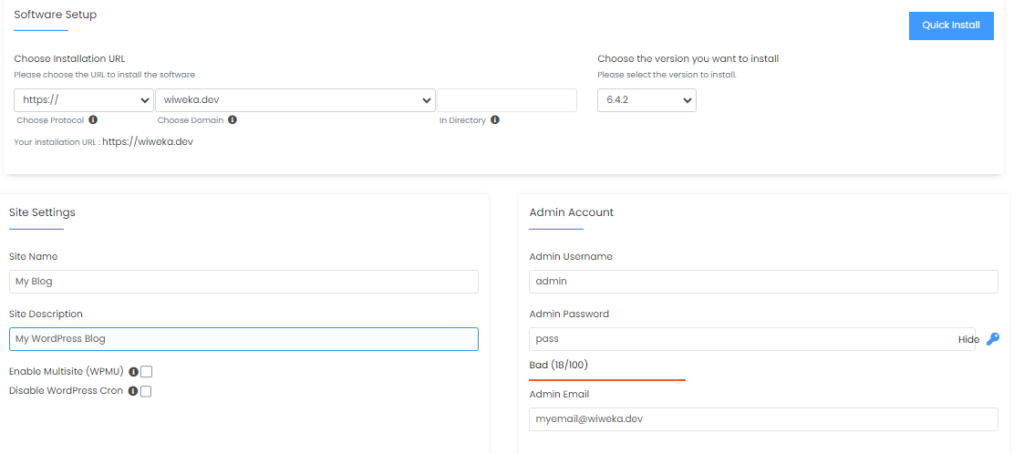
- On the installation page, you need to configure various settings for your WordPress installation.
- Choose the version of WordPress you want to install. It is recommended to select the latest stable version.
- Select the domain or subdomain where you want to install WordPress.
- If necessary, select the directory where you want to install WordPress or leave it blank to install in the root directory.
- Enter a name and description for your website.
- Set up an administrator username and password for managing your WordPress site.
- Provide an email address for the admin user.
- You can customize the default settings or leave them as they are.
- Click on the “Install” button to proceed.
Step 5: Wait for the Installation to Complete #
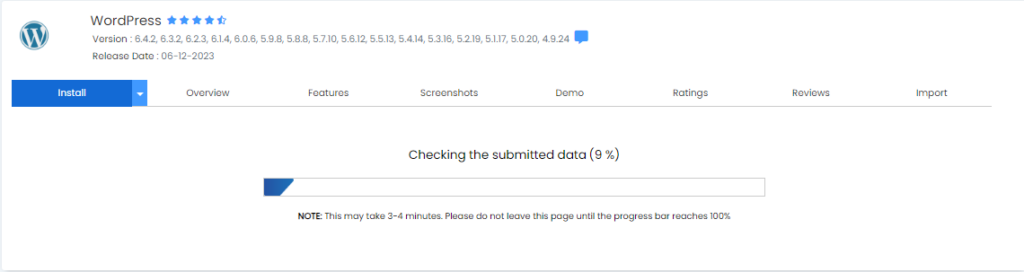
- Softaculous will now install WordPress using the provided settings.
- Wait for the installation process to complete. Softaculous will display a success message once finished.
Step 6: Access Your WordPress Website #
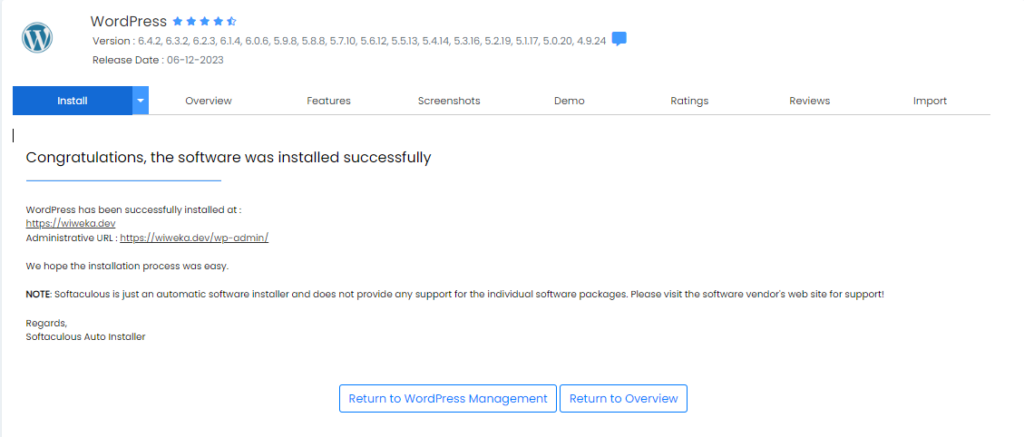
- In just a few seconds, the WordPress installation is complete. This is marked by congratulations from Softaculous.
- You can now visit your WordPress website by clicking the link or entering the URL in your web browser.
- The initial setup is complete, and you can log in to the WordPress admin dashboard to start customizing your website.
Conclusion #
By following these steps, you have successfully installed WordPress using Softaculous. You can now begin building your website by selecting a theme, installing plugins, and creating content. If you encounter any issues, refer to the Softaculous documentation or contact your hosting provider for support.
